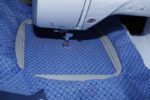
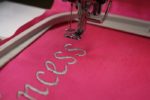
Smocking is a traditional and well-known style of needlework. Smocking allows you to embellish clothing and other stuff with colorful and unique threads. Further, the basic purpose of smocking is to allow smaller or larger garments to fit a variety of body types.
On the other hand, during stitching, you may give your clothing some flexibility. The stitching was embellished with embroidery to provide the garment with an ornamental touch. Furthermore, smocking is still in fashion as christening gowns, and other special occasions still use smocking. Now, the question is how to do smocking on a sewing machine, as not everyone knows that. Smocking is the most effective method for controlling the fullness of your garment.
So, learn How to do smocking on a sewing machine with us today. We have simple and easy techniques for you. Now learn and do it by yourself to give the new life to your old and bore outfits.
Materials used in the smocking:
You need the following 3 things;
- Fabric: You can use any fabric you want to smock, but we recommend you use soft and lightweight fabric.
- Best Sewing machine: use SINGER | Heavy Duty 4452 Sewing Machine for effective smocking.
- Thread: use embroidery floss threads to get the best possible results.
Step by step:
Kindly follow each and every step for the perfect smocking.
Step 1:
Shrunk the fabric before smocking, and then after drying, place your fabric on the table. And the fabric must be stretch-free so you can mark smoothly. Now you can mark the fabric with a yardstick or straight edge, so you know where to smock. The distance between the lines should be between 1/4 and 0.5 inches. So, the dotted line must be drawn along the length of the fabric on the right side by using a fabric marker or pencil.
What is the best way to gather fabric for smocking?
It is possible to gather the fabric in three ways:
- By Machine
- Using a pleater
- By hand
Which is the easiest way to gather?
Honestly speaking, hand gathering is the easiest way as you can reshape if you don’t find it suitable.
Step 2:
Make a bobbin out of thread and wind it by hand. Make sure that there is no tension in the thread, and wind it tightly with one hand. So, the thread doesn’t get too tangled when you use a sewing machine.
Also, make sure the folds are spread evenly. Plus, the other ends of your fabric tie at a loose end at an even spacing. Moreover, make sure that the pleats aren’t too tight nor too loose so you can smock smoothly and get the perfect smocking.
Step 3:
In this step, you have to choose the stitch for smocking which is quite crucial. It is not necessary to have a large number of decorative stitches on your sewing machine in order to smock clothes. You can replace the traditional cable stitch on your embroidery garment with a stretch stitch easily. In addition to this, you can also use a zigzag stitch.
Moreover, it is also possible to create several shapes with two threads and needles by performing zigzag stitches. And you can also check your sewing machine’s manual for the best results with decorative stitches for smocking.
Further, follow the instructions step by step to thread the machine as you would normally, wound the elastic thread into the bobbin.
Step 4:
Now, in this step, you have to place the right side of the fabric in the sewing machine. In case if you place the wrong side of the fabric, you may have to face the elastic thread in the bobbin. Plus, decorative stitches sew across the surface of the gathers once the fabric prepares and make straight rows between the gathering stitches. Make sure that the gathers are even so you can smock evenly and smoothly. More on, you can simply pull the running stitches after you finish the smocking stitches on the sewing machine.
Which is the best fabric for smocking?
For the even and balanced smocking, the fabric should be soft and lightweight. Usually, the expert recommends 3 types of fabric, cotton, linen, and silk, as it is easy to handle. Moreover, gingham and striped fabric are also suitable. It is better to use firm fabrics that can be easily embellished.
Fabric is pulled up during the gathering process, thus adding complexity and chunkiness to the piece. In addition, thicker fabrics are bulkier and look out of place. So, to get better results to use the recommended fabric.
Types of Smocking?
Different areas of the country utilize different gathering and embroidery techniques. Usually, smocking is classified into 3 types that are Canadian, English, and American smocking.
Further, several stitches include; outline stitch, honeycomb stitch, cable stitch, surface honeycomb stitch, wave stitch, and vandyke stitch.
More on, you can use beads within the plates to make your fabric more attractive and catchy.
Canadian Smocking: Smocking in Canada is a unique style of hand stitching. The front of the fabric has a beautiful folded design and turn ordinary object and fabric into an appealing design.
English Smocking: embroidery on pre-pleated fabric is known as English smocking. Further, honeycomb-shaped needlework is created by gathering and stitching materials and will ensure that the fabric below the pleats is folded evenly.
American smocking: It is quite different from Candian and English smocking. The reverse of the fabric uses exclusively for American smocking. As a result, the fabric has a thickly gathered appearance. There has been a tradition of using dots to indicate design. However, a grid is more effective.
FAQs
Which stitch is used for smoking?
There are several kinds of stitches that you can use for smocking. Hand stitching uses to gather fabrics into minor shapes with smocking. More on, the back of the fabric, the threads are pulled tight. And during direct smoking, it is possible to see the stitching.
What is the difference between shirring and smocking?
Shirring gathers fabric to embellish a few parts of the shirt, and it creates round, evenly spaced tucks. On the other hand, smocking produces pleats without a stretch. And smocking is the art of gathering fabric into decorative embroidery designs. What are the 5 basic smocking stitches? The basic five stages of smocking are;
Stage 1. Course or track fro smocking.
Stage 2. starter stitch.
Stage 3. Sketch stitch or make a boundary.
Stage 4. Select stitches.
Stage 5. Finishing.
How is smocking done?
Smocking is a method of assembling clothing by stitching small stitches in form or pattern. To create beautiful pleats, use colorful stitching and little rows of pleats. Further, to get a detailed answer, please read the stages mentioned above.
Can you smock by hand?
Yes, you can pleat by hand, although it is a bit difficult and requires patience. For effective smocking, your gathering must be even. That is, all gatherings should have the same pleat on the first row, the second row, and the last row.
Conclusion
There is no hard and fast rule for smocking, and the only important thing is that the pleating must be even so you can get fruitful results. With the smocking, you can add life to your dresses and can embellish many other items other than garments.
Smocking is an ancient form of needlework that might interest you. Several centuries have passed since smocking first appeared in various countries. If you don’t know how to do smocking on a sewing machine, then our article helps you. We explain the process in detail and in a simple way. Try the different stitches and give a new experience to your expertise.


